Summer is quickly approaching and it’s time to be outside – cooking up the best meals on the best camping grills. Nothing beats the convenience of having a portable grill. Whether you’re cooking up some burgers, hot dogs, or even a full meal, a portable camping grill is an essential piece of equipment for any camping trip. But with so many options on the market, which one should you choose? In this blog post, we’ll take a look at some of the best camping grills.
Time to read:
3–4 minutes
Before jumping into the blog:
Please consider joining the gone community by subscribing below & following us on social media. It’s 100% free, and well worth the price of admission. We’ll update you with the newest RV lifestyle stories, tips and tricks, mental wellness tips, and so much more. DMs are always open to chat, and we’ll answer any questions you have about this lifestyle – it doesn’t have to be scary! We also promise not to spam your inbox with junk – we don’t care for that either.
Blackstone Tailgater, one of the best camping grill options.
The Blackstone Tailgater is a versatile grill that is perfect for camping. It has a cooking surface of 512 square inches, which is large enough to cook for a large group of people. The Tailgater also features a griddle top, which means you can cook pancakes, eggs, and more.
Weber Q120 is a compact, portable camping grill that is perfect for cooking the camping necessities for a few people.
The Weber Q1200 is a compact, portable grill that is perfect for solo camping. It has a cooking surface of 189 square inches, which is plenty of space for burgers, hot dogs, and a few more small items. The Q1200 also features a built-in thermometer, which makes it easy to monitor the temperature of your food.
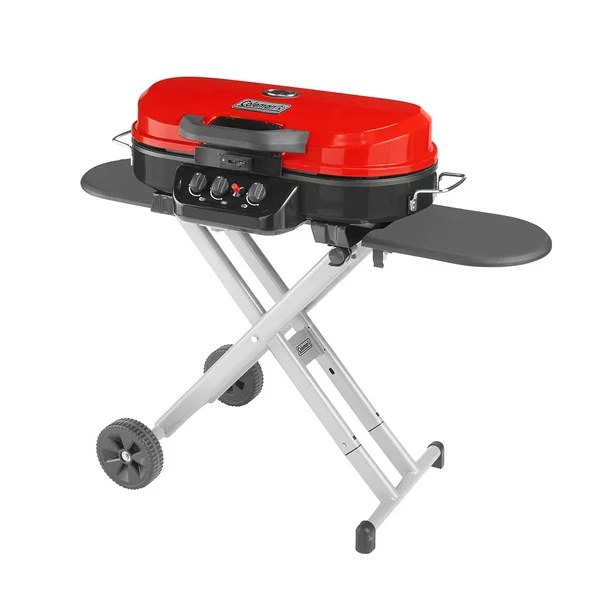
Coleman RoadTrip 285 is a versatile portable camping grill with interchangeable cooktops – allows for different types of cooking styles in a small form-factor.
The Coleman RoadTrip 285 is a versatile grill that is perfect for the camper who wants flexibility. It has a cooking surface of 285 square inches, which is large enough to cook for a small group of people. The RoadTrip 285 also features interchangeable cooktops, which means you can use it as a grill, griddle, or stove.
Cuisinart CGG-180T is a small camping grill for a few people. It’s extremely portable and also the cheapest on this top camping grills list.
The Cuisinart CGG-180T is a compact, tabletop grill. It has a cooking surface of 145 square inches, which is enough space to cook for a small group of people or a large meal for a solo camper. The CGG-180T also features a built-in thermometer, which makes it easy to monitor the temperature of your food.
Char-Broil Grill2Go X200 is a rugged, portable camping grill with enough cook space for a small group of people.
The Char-Broil Grill2Go X200 is a rugged, portable grill that is built to last. It has a cooking surface of 200 square inches, which is plenty of space to cook for a small group of people. The Grill2Go X200 also features a built-in thermometer, which makes it easy to monitor the temperature of your food.
Which camping grill do you like the most? Do you have a large family and need something larger like the Blackstone Tailgater? Or are you used to roughin’ it in the great outdoors and want the most rugged and tough camping grill?
No matter which portable camping grill you choose, make sure to read the manufacturer’s instructions carefully before using it. Always follow safety guidelines and make sure to keep the grill away from anything that could catch fire – tents, awnings, etc. With the right portable grill, you’ll be able to enjoy delicious meals while enjoying the great outdoors.
Advertisements
Our DMs are always open on social media if you want to connect, ask any questions about RV life, or just to bounce some ideas off us before you take off on your next trip.
Please consider joining the gone community by subscribing below & following us on social media. It’s 100% free, and well worth the price of admission. We’ll update you with the newest RV lifestyle stories, tips and tricks, mental wellness tips, and so much more. DMs are always open to chat, and we’ll answer any questions you have about this lifestyle – it doesn’t have to be scary! We also promise not to spam your inbox with junk – we don’t care for that either.
Want to continue reading? We’ve got plenty more blogs to binge read 🙂
If you haven’t used a RV before, it can be a little intimidating. We’ve been there too (we all started as newbies!), so today we’re bringing you this RV guide for beginners to help make the process painless. After reading this RV guide, you’ll learn how to setup your campsite and all the needed utilities for a RV. This will get you out in the great outdoors and finding your next adventure in no time. We’re Matt & Bree with No Place Like Gone, and we’ve been living and traveling the US full-time in a RV for almost a year now, here are our tips for setting up an RV for the first time.
Time to read:
9–13 minutes
Please consider joining the gone community by subscribing below & following us on social media. It’s 100% free, and well worth the price of admission. We’ll update you with the newest RV lifestyle stories, tips and tricks, mental wellness tips, and so much more. DMs are always open to chat, and we’ll answer any questions you have about this lifestyle – it doesn’t have to be scary! We also promise not to spam your inbox with junk – we don’t care for that either.
If you have any questions while reading this RV guide, make sure to shoot us a DM on social media with the below links:
Below are the basic steps of RV set up, from pulling in to the campground to roasting those s’mores. Keep reading for a detailed description of each step.
Arrive at campground
Find site number
Park in site
Level
Release slides (if you have them)
Hook up your utilities
Electricity
Water
Sewer
Enjoy camping!
Arriving at the Campsite
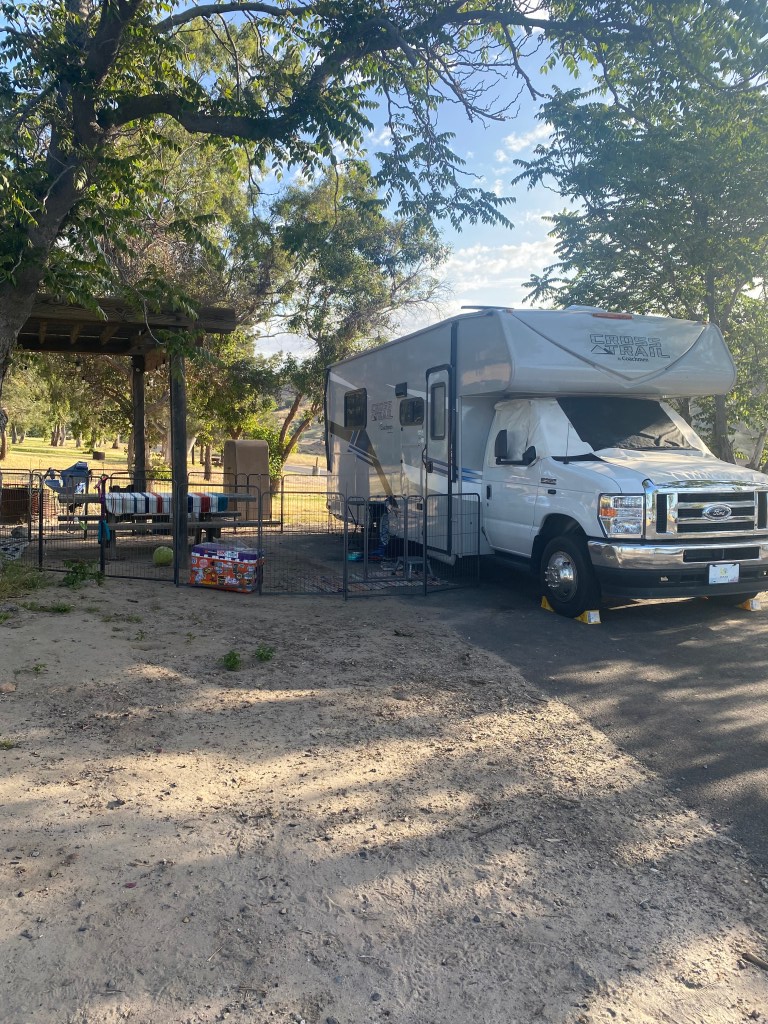
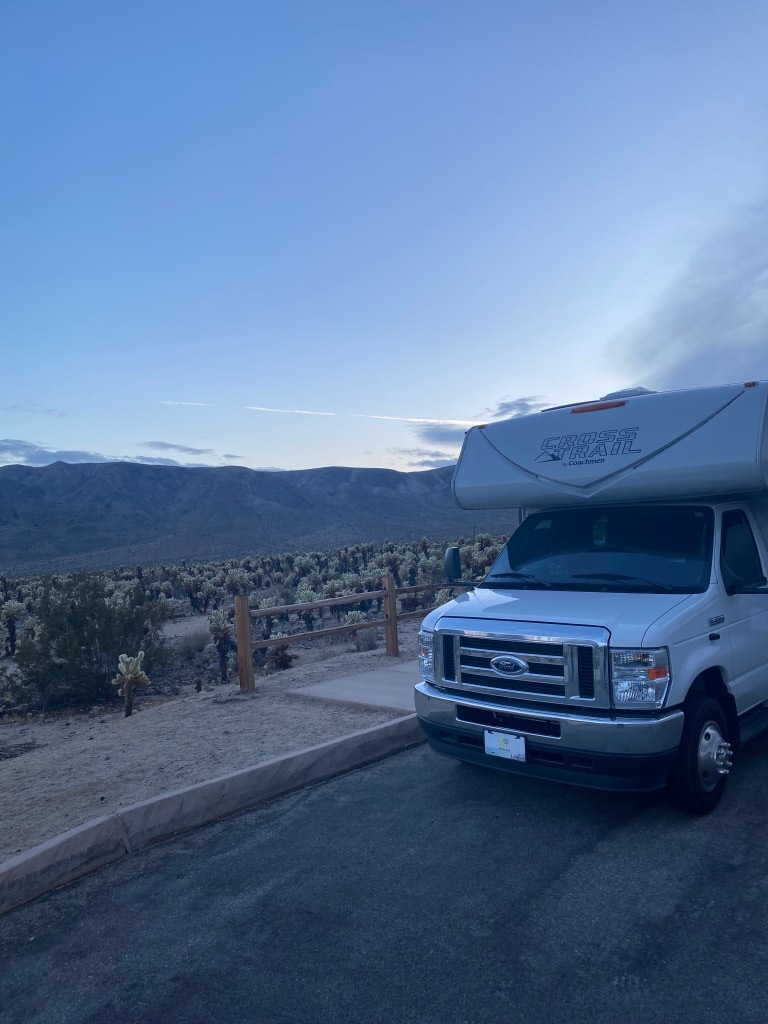
Our RV parked in a campsite in SoCal.
Once you get to the campground you’ve decided to stay at, you’ll have to find where your campsite number is.
Generally, numbering starts from smallest to largest and increases the further you drive. Go slow and pay attention to directional signs. Once you find your campsite, park in front of it but make sure you aren’t blocking the road. You’ll want to hop out to walk the perimeter of the campsite before parking.
Look for where the utilities are located in the campsite (electricity, water, sewer) but keep in mind not all campsites will have all three. Confirm where the utilities hook up on your RV or camper (typically on the driver’s side).
Check and see whether it’s easier to pull-in or back-in to the spot, typically you can tell by how the campsite is angled against the road – the utilities will also help determine this.
Park Your RV With This Guide
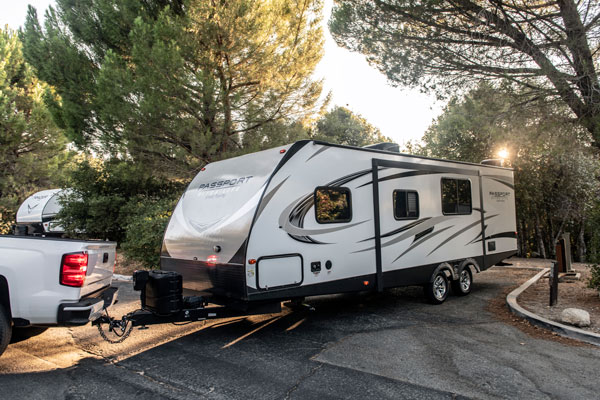
If you aren’t by yourself, you’re in luck (for many reasons). The person with you should hop out so that they can help guide you into the spot. Parking an RV takes teamwork! This is especially important when you are guiding your RV back into a spot. Instead of shouting throughout the campground, it’s best if you get on the phone to communicate directions with each other.
Backing up a trailer is no easy feat for a newbie – it takes practice AND patience.
Once backed into the spot, give yourself a pat on the back! If you managed to miss hitting anything, give yourself another pat on the belly … it’s dinner time! Well, first you have to hook the RV up to power, water, and all of the other things but you’ll be bbq’ing in no time.
RV Leveling Guide
You’ll want to make sure the RV is level so that you don’t trip, get hurt, or feel wobbly. There’s also other benefits behind this like water and propane flowing properly as well. If your fridge runs off of propane it is especially important to be level to prevent damage to your appliance.
If you’re renting a RV or camper, you might not have the right equipment to level. Make sure to check with who you have rented fromif to confirm they provided leveling instructions.
Auto-Levelers
One type of auto-leveler.Another type of auto-leveler.
If you have auto-levelers, you are the luckiest of all. You would know this because they are a huge deal in the world of RVs. With auto-levelers you can press a few buttons and be leveled within a minute or two. That makes things easy, right?
Jack Stands
With automatic jack stands, you can press the buttons to maneuver the jack stands down onto the ground to help you level and support your RV. If you have manual jack stands, you’ll have to use an impact drill or lever to turn the jacks to the proper height on each side.
Leveling Blocks
10-pack of Camco leveling blocks. Click the image above to be taken to the blocks we recommend on Amazon.
We use leveling blocks because we’re cheap, woo! With these, you’ll have to pull up onto the blocks and check your levels a few times until you get it right. The blocks interlock and stack just like legos, nothing fancy here, folks.
Quick Guide to Slide-Outs
Slide-outs are a great way to gain additional space in your RV’s floor plan. Many rigs have 2-3 slide-outs and there’s also some without any. We live full-time in a 2022 Coachmen Cross Trail 23XG which is a model with no slide-outs.
Our motorhome: 2022 Coachmen Cross Trail 23XG in Jacksonville, FL.
You’ll want to make sure that how you parked allows adequate room for the slide-outs on each side. This will mean that you can not be parked too close to trees or any other obstructions.
Insider tip: Typically you’ll have to leave the engine running of your motorhome to operate the slides, whereas campers and travel trailers do not have this problem.
By finding the slide-out control panel (probably located in the interior of the entrance to your RV) you can operate the slide-outs with the buttons. Make sure that you don’t hear any crazy or weird noises as they are extending out.
Insider tip: You can also open the windows so that you can watch as the slides come out. This will give you extra views to watch any trees or potential danger objects.
Utilities Guide for RVs
Electrical Hook-up
We’re going to have a crash course on RV utilities. Make sure you have all the proper RV accessories and necessities if you are new to camping so that you don’t have any issues when you get to the campsite.
For the renters: if you’re renting, you should have a water hose, sewer hose, power cord, and potentially other accessories with your RV. Make sure to check with who you’ve rented from to confirm what came with your rental.
An electrical surge protector is highly recommended. Click the image to see the one we use from Amazon.
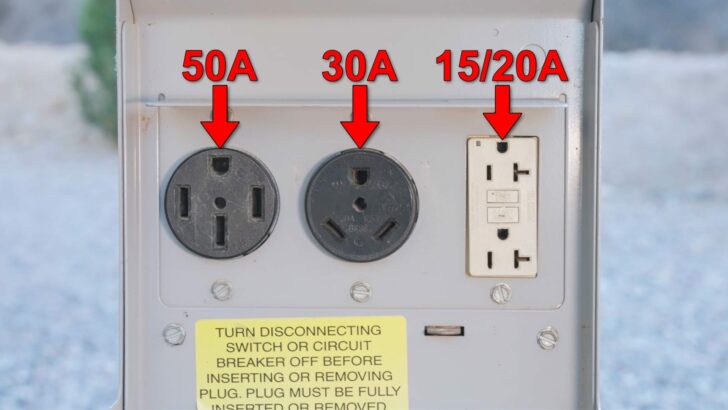
You’ll want to hook up your electrical surge protector and flick on the 30A or 50A breaker depending on what your RV or camper is. You’ll find this out by which cord you have – it’s either 3-prongs or 4-prongs.
50A with four prongs (far left), 30A with three prongs (middle), 15/20A is a house electrical outlet (far right).
Do not hook up your RV or camper power cord yet! You should only be putting an electrical surge protector to the power pedestal (a sophisticated word for “electrical hook-up”).
Flick on the 30A or 50A depending on your cord, and check if the power is all green lights and safe to use. Otherwise, bring up any grounding issues or faulty electrical problems to the campground staff immediately.
Once your surge protector gives you an A-O-K, it’s time to move on to the power cord. Flick off the 30A or 50A breaker (depending on which one you turned on) to connect your power cord to the surge protector. After, connect the other side of the power cord to your RV electrical connection port. Now is time for the power – flick the corresponding breaker from back on.
Water Connections
A water pressure regulator is recommended to protect the plumbing in your RV. Click the image to see the one we recommend on Amazon.A water filter guarantees you’ll have cleaner water coming into your RV. You’ll want this if you plan to drink the water. Click the image to see the one we recommend on Amazon.
You’ll want to start with turning on your water spigot at the campsite to verify that it works. Let it run for 20-30 seconds to remove any sediment and water that may be settled down in the pipe. Now you can turn it back off.
It’s time to connect your water pressure regulator. One end of the water hose will then connect to the water pressure regulator, and the other end to the water connection on your rig (another word for RV). Be sure to look for the connection that says “city connection” or something similar and NOT “tank fill” – otherwise you’ll be filing your fresh water tank only!
Now you can jump for joy because all you have remaining for this section of the RV guide is to turn on the water and hope for plumbing to do its job. If you notice any leaks or spraying, turn off the water and try to tighten the connection where you saw an issue. Usually this is a simple and quick fix.
Sewer Connections
Remember, not all campsites will have all of these utility connections. Sewer is the least common to see, but many places that are more expensive do have a hook-up for this. If you want to know what van life is actually like, you may end up with poop on you at this point. Just warning you now so that you are prepared for the inevitable.
You’ll want to put one end of the sewer hose aka stinky slinky (lol, it literally is one though) to the waste connection on your RV. This will be a black plastic valve somewhere under the RV near the other utilities at the rear.
MAKE SURE THE SEWER VALVE HANDLES ARE CLOSED! There should be two of them and both should be closed or you will end up with a mess on your hands.
After connecting to your RV, place the other end of the poop slinky (I coined this term) down into the campsite sewer connection on the ground. From here you can let the tanks fill and dump once or you can let the gray drain while you’re parked. If you opt to leave the gray open (sink and shower waste) be sure temperatures won’t be dropping below freezing. Whether you dump once or leave the gray open, you have to leave the black tank (toilet and poop) valve closed and only dump it when you’re ready.
Insider tip: When you go to leave, you’ll always drain the black tank first and then the grey tank after because the sink water will help wash down the poop hose and any potential clogs.
Our new camping merch will level you up from RV beginner to RV pro.
Get to Camping!
That’s basically it … you’ve made it through this RV Setup Guide for Beginners. It wasn’t that bad, was it?
There’s plenty more to learn about this lifestyle, and we want to share it all with you. But the very best way to learn about it – go on a camping trip yourself!
And, we really want to hear about your adventure. If you’re reading this guide, that means you’re probably about to go somewhere awesome very soon. So, where are you camping? Tell us about it in the comments below.
Where Will Your Next Adventure Be After Reading Our RV Guide?
If you liked the blog, please share it with your friends (links below):
Please consider joining the gone community by subscribing below & following us on social media. It’s 100% free, and well worth the price of admission. We’ll update you with the newest RV lifestyle stories, tips and tricks, mental wellness tips, and so much more. DMs are always open to chat, and we’ll answer any questions you have about this lifestyle – it doesn’t have to be scary! We also promise not to spam your inbox with junk – we don’t care for that either.
DM us on social media (with the buttons below) if you have any questions or feedback about the blog today!
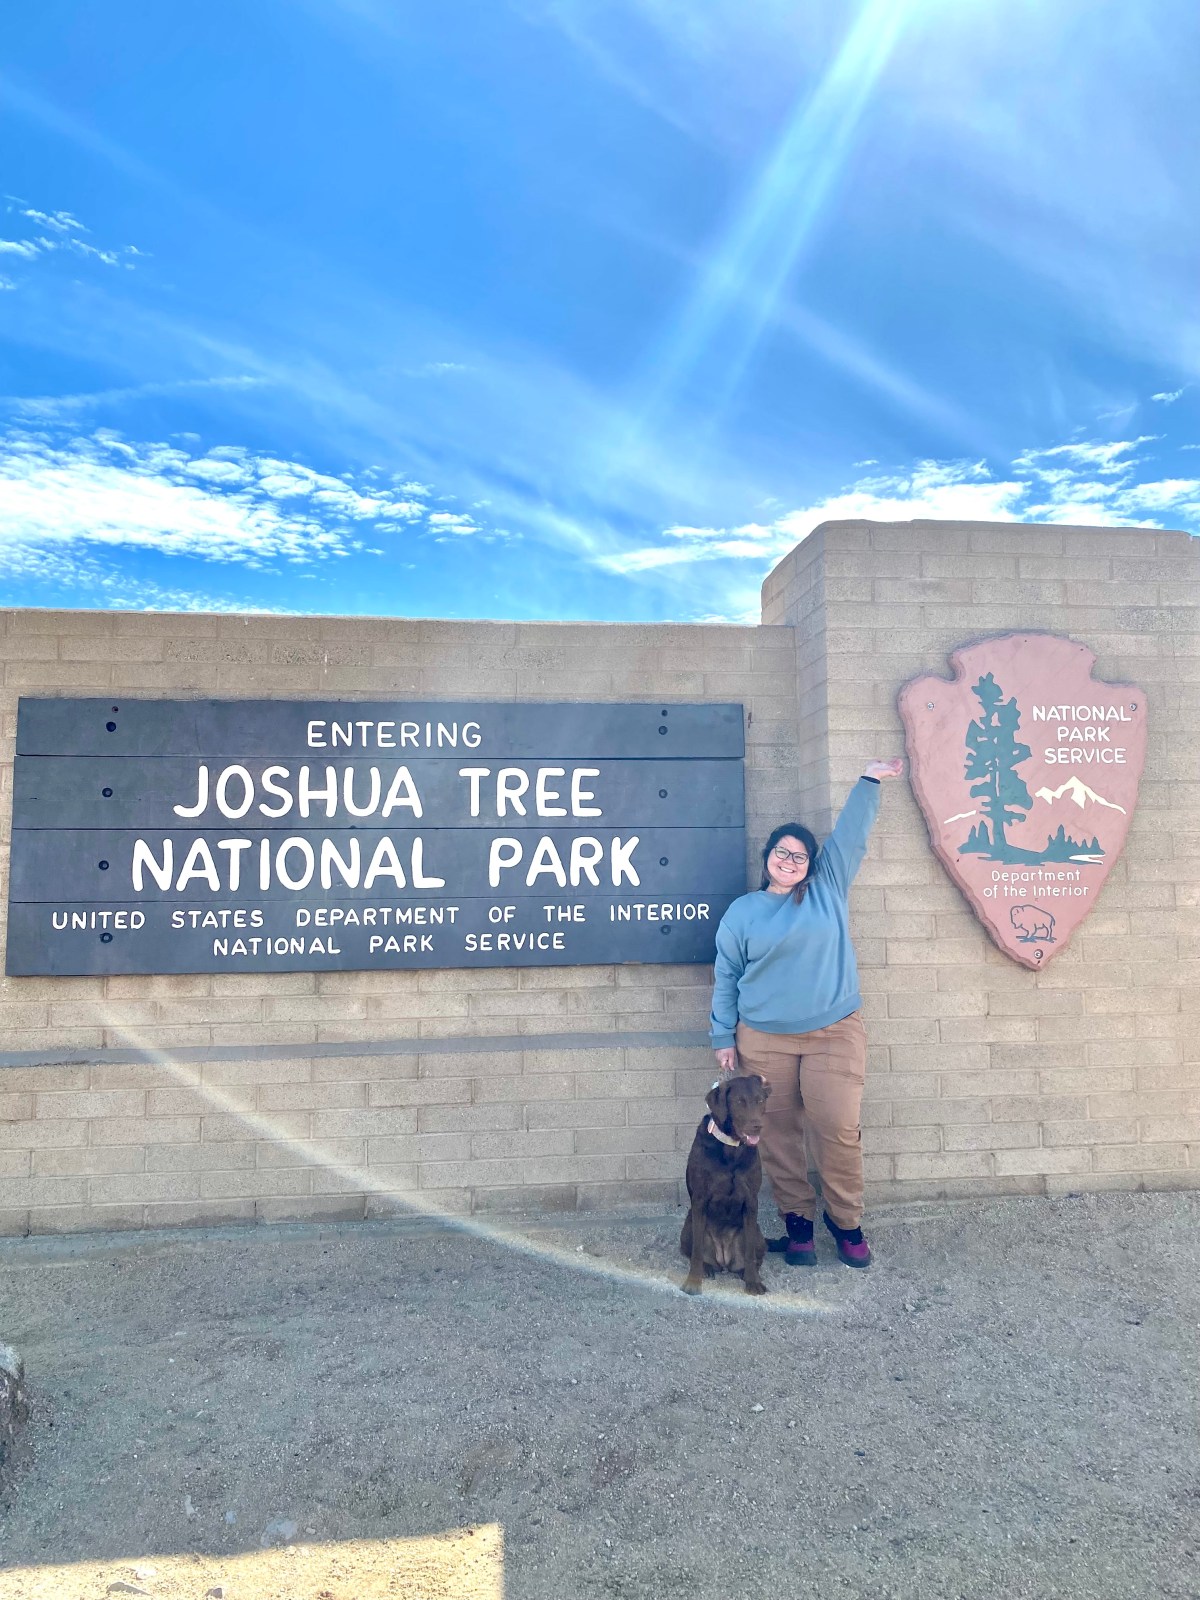
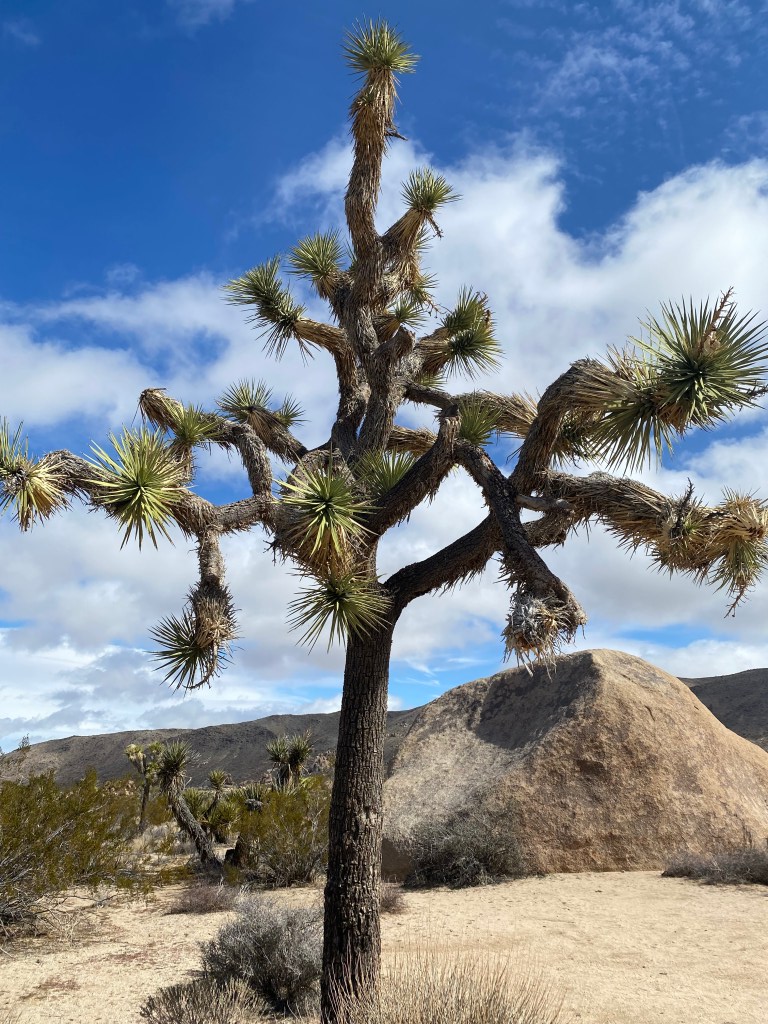
Joshua Tree National Park is located in southern California, covering an area of almost one million acres. The park is named after the unique (and eerie) Joshua tree, which is native only to the Mojave Desert and is found throughout the park. The park is a popular destination for nature lovers, hikers, rock climbers, and photographers of Joshua Trees.
Estimated time to read:
12–18 minutes
The park is divided into two distinct ecosystems: the Mojave Desert and the Colorado Desert. The Mojave Desert is characterized by its high elevation and rocky terrain, while the Colorado Desert is lower and has a more diverse landscape, including sand dunes and palm oases.
Advertisements
One of the most popular activities in Joshua Tree National Park is hiking. There are over 100 miles of hiking trails throughout the park, ranging from easy walks to strenuous hikes that require technical skill. Some of the most popular hikes include the Hidden Valley Trail, the Barker Dam Trail, and the Ryan Mountain Trail.
Joshua Tree National Park is also a VERY popular destination for rock climbers. The park has a whopping 8,000 climbing routes and is considered one of the best places in the world for bouldering. The park’s granite rock formations and unique geological features make it a challenging and rewarding destination for climbers of all skill levels. There are several local outfitters that will teach you to safely climb if you’re new to the sport.
In addition to hiking and rock climbing, Joshua Tree National Park offers visitors an incredible opportunity to stargaze. The park is located miles from major cities, which makes it an ideal location for viewing the night sky. Joshua Tree is a designated International Dark Sky Park and boasts some of the darkest skies in the U.S. On clear nights, visitors can even see the Milky Way.
Overall, Joshua Tree National Park is a must-visit destination for any nature enthusiast. Its unique landscape and diverse ecosystem offer visitors a truly unforgettable (and instagram worthy) experience.
Advertisements
Map of Joshua Tree:
Joshua Tree National Park is the 15th-largest National Park in the United States. It’s a few thousand acres away from being a total of 800,000 acres – which is relatively small as far as National Parks go. From north to south, the park is close to one hour of driving distance but can take a little longer depending on your route planning & stops. The shortest route is along Park Boulevard, so if you stay on this road then you’ll save extra time.
Refer to the map below to plan your adventure and see the landscape. We’ve also included a downloadable PDF below to get you jumpstarted with planning your trip to the park!
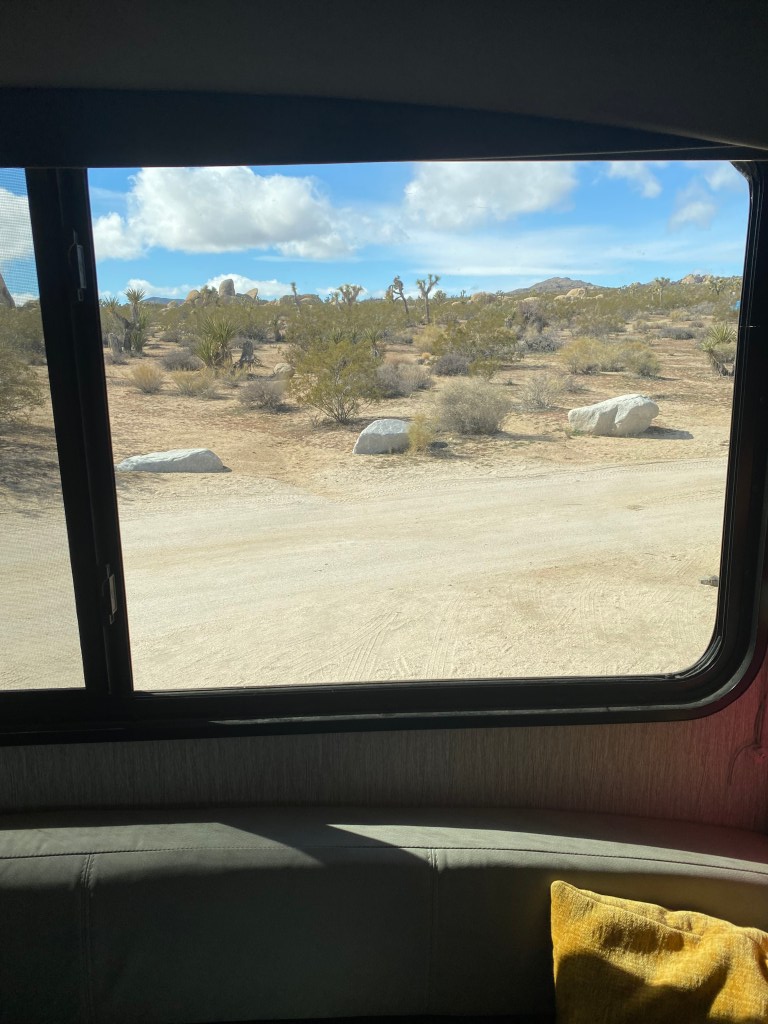
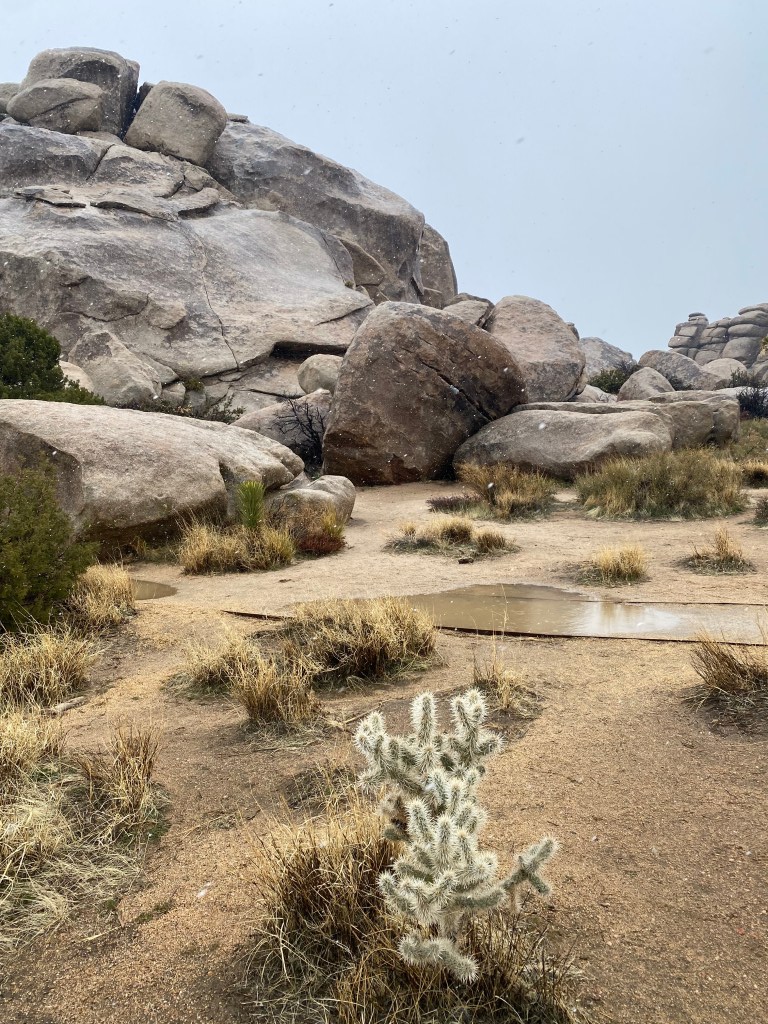
We Had Bad Weather at Joshua Tree … Make Sure to Check for Alerts!
Check this link to read the most current alerts at Joshua Tree National Park. While we were there, we encountered clear skies, rain, sleet, hail, and snow all in one day. It was a brutal storm moving in, but we enjoyed our unique time at the park nonetheless!
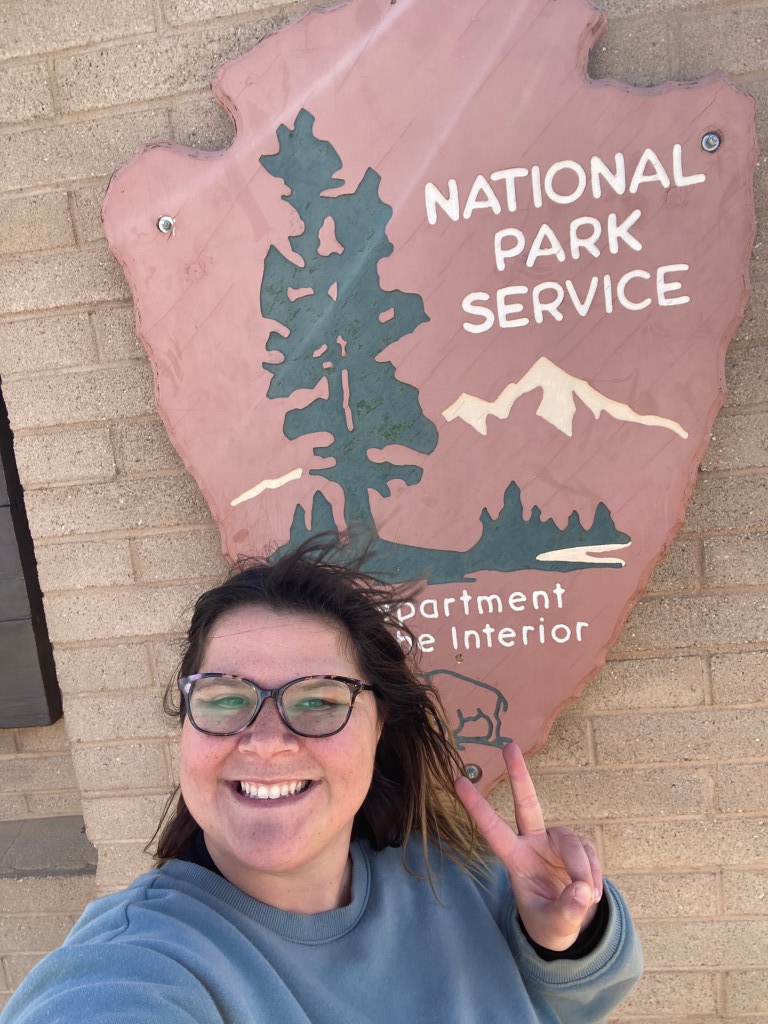
Visitor Centers @ Joshua Tree
There are THREE visitor centers in Joshua Tree. While we were there, the Oasis Visitor Center was closed, but we checked out the other two. Joshua Tree Visitor Center is at the main entrance that the majority of people come into from the Los Angeles area. Expect this center to be packed full of clamoring tourists, while the other two are much smaller experiences for those quiet minds.
We checked out this visitor center on the northwestern edge of the park, and it has just about everything. They’ve got a gift shop, plenty of cool exhibits, a cactus garden (albeit sad in the snow,) a coffee shop next door, and friendly park staff. This visitor center is also right next to the town of Joshua Tree – allowing you to make a day trip to explore the unique area if you’re so inclined.
Advertisements
Cottonwood Visitor Center
This visitor center was the first one we went to because of proximity to our campsite but it was well worth it. Of course they have the usual maps, information, and souvenirs but the best part is just around the corner. If you’re going to do any of the visitor centers, don’t miss this one for incredible views of the Cottonwood Spring, a quick walk from the nearby parking area. Here you will see larger-than-life palms, unique flora and fauna, and (if you’re lucky) the spring.
Oasis Visitor Center
This visitor center was closed when we went to the park. I checked online recently and it now says permanently closed … so expect that when you go! Regardless, this visitor center is right next to the Oasis of Mara which we heard is beautiful. Also near this area is Sky’s the Limit which is well worth the visit itself (more on that below).
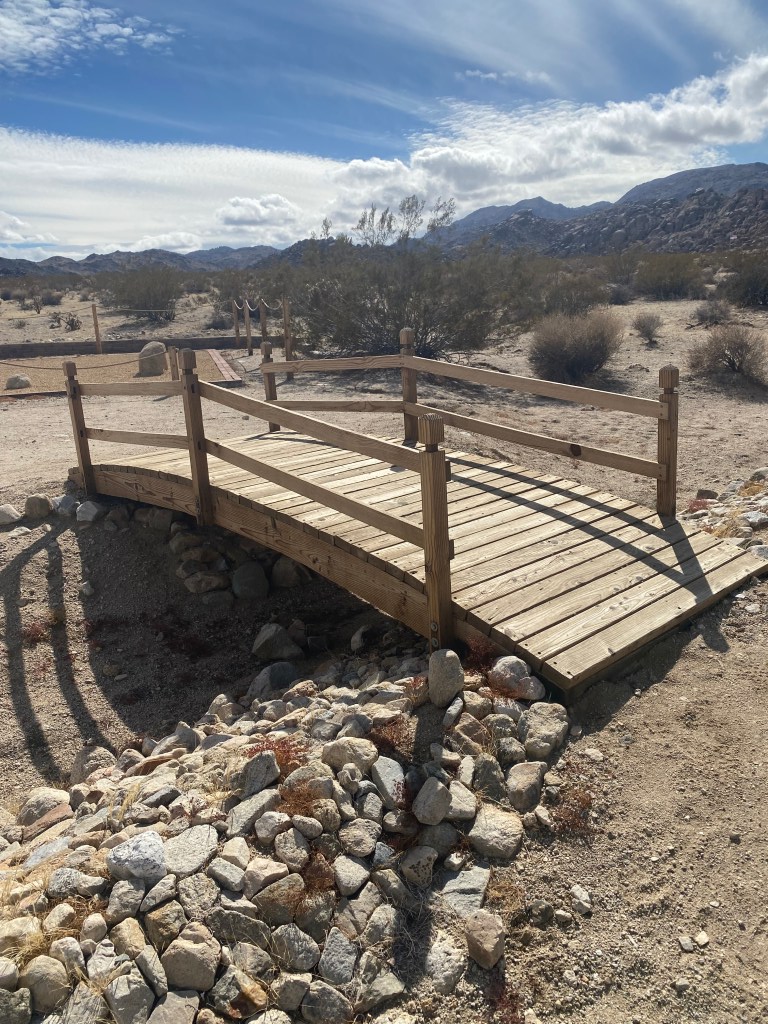
– Our Campsite at Joshua Tree –
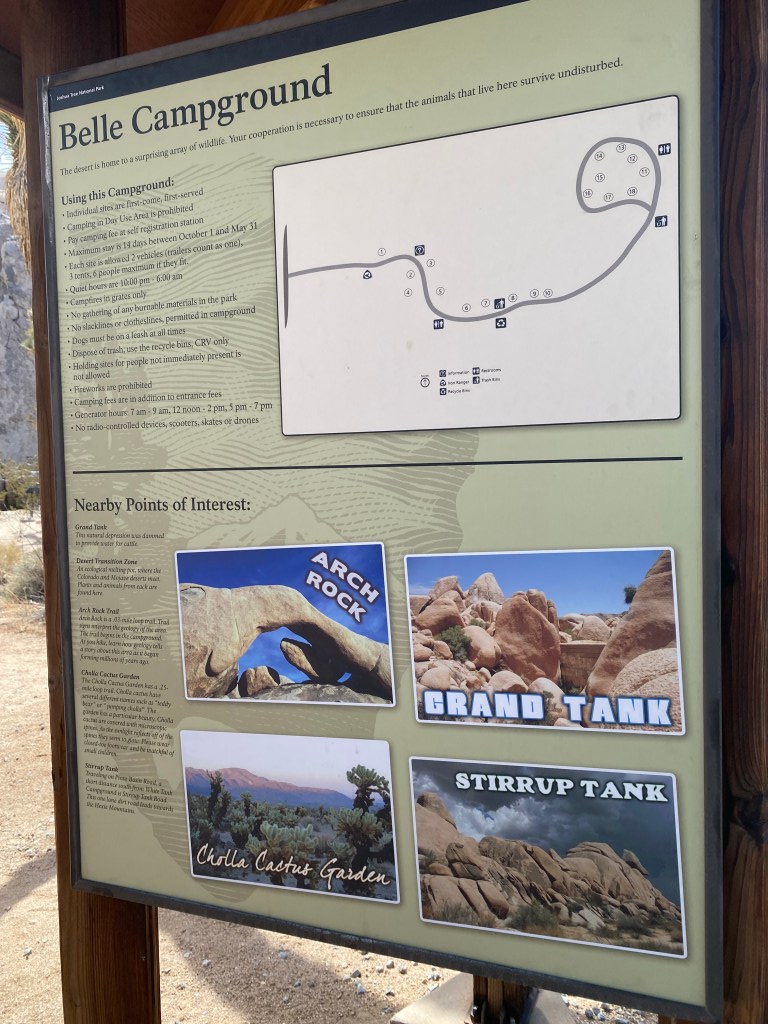
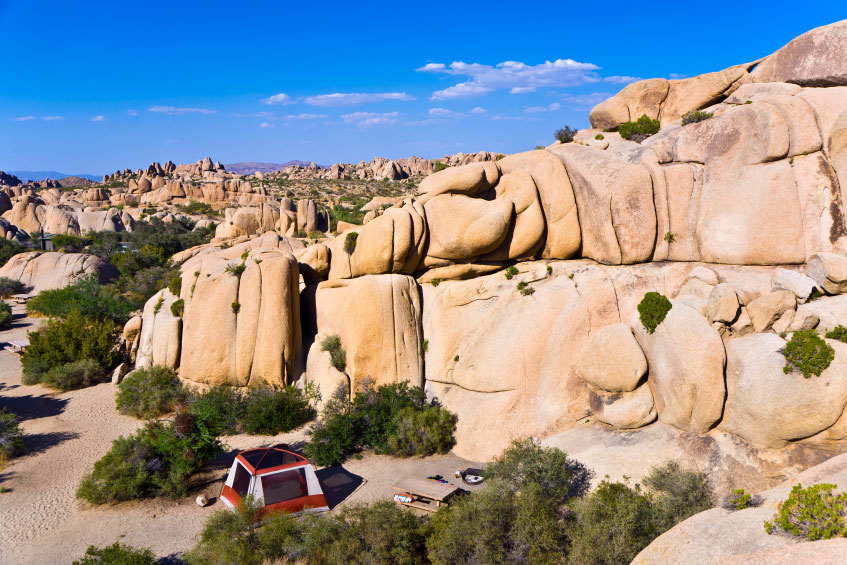
Belle Campground, #17
Belle Campground: $15/night dry camping. Pit toilets, tables, and fire grates on site. No water.
This is where we camped out, and you can see plenty of awesome pictures we took just at the campground. We originally wanted to be at Jumbo Rocks campground, but it was booked way out in advance. If your plan is to get one of these first-come, first-serve spots, make sure to get there early (before noon). Especially on the weekends!
Advertisements
– Other Camping Options at Joshua Tree National Park –
Reservations Required Camping:
Black Rock: $25/night, 99 campsites. Water, flush toilets, tables, fire grates, and a dump station.
Cottonwood: $25/night, 62 campsites. Water, flush toilets, tables, fire grates, and a dump station.
Indian Cove: $25/night, 101 campsites. Pit toilets, tables, and fire grates. No water.
Jumbo Rocks: $20/night, 124 campsites. Pit toilets, tables, and fire grates. No water.
Ryan: $20/night, 31 campsites. Pit toilets, tables, and fire grates. No water.
Hidden Valley: $15/night, 44 campsites. Pit toilets, tables, and fire grates. No water.
White Tank: $15/night, 15 campsites. Pit toilets, tables, and fire grates. No water.
Places We Explored in Joshua Tree:
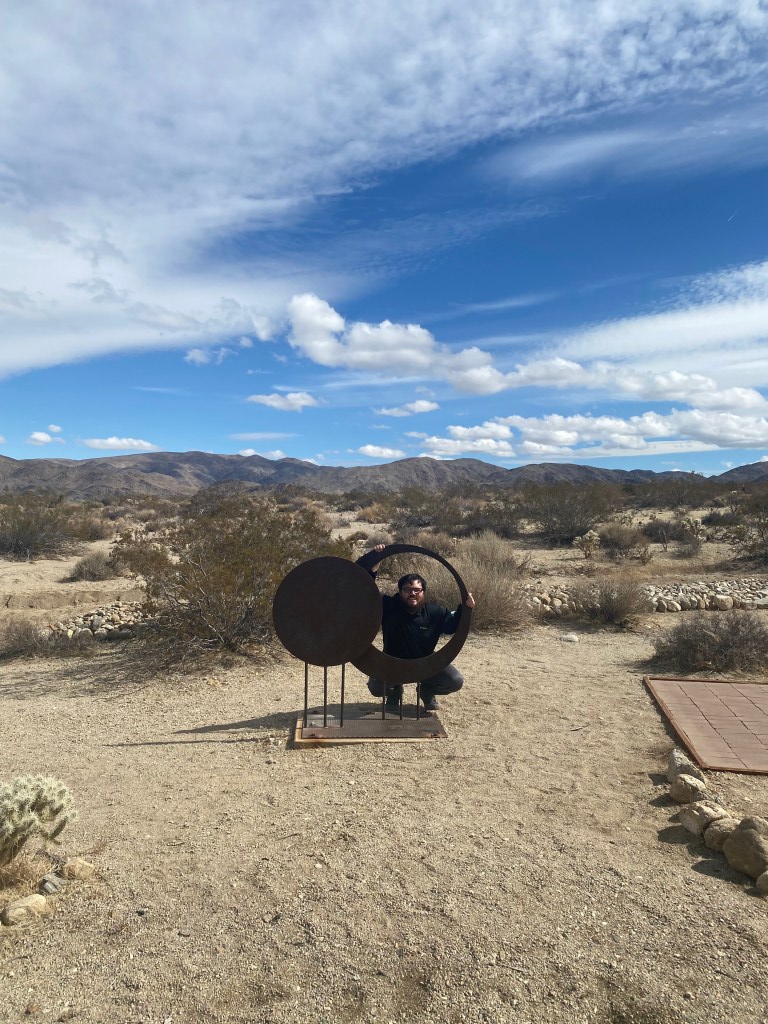
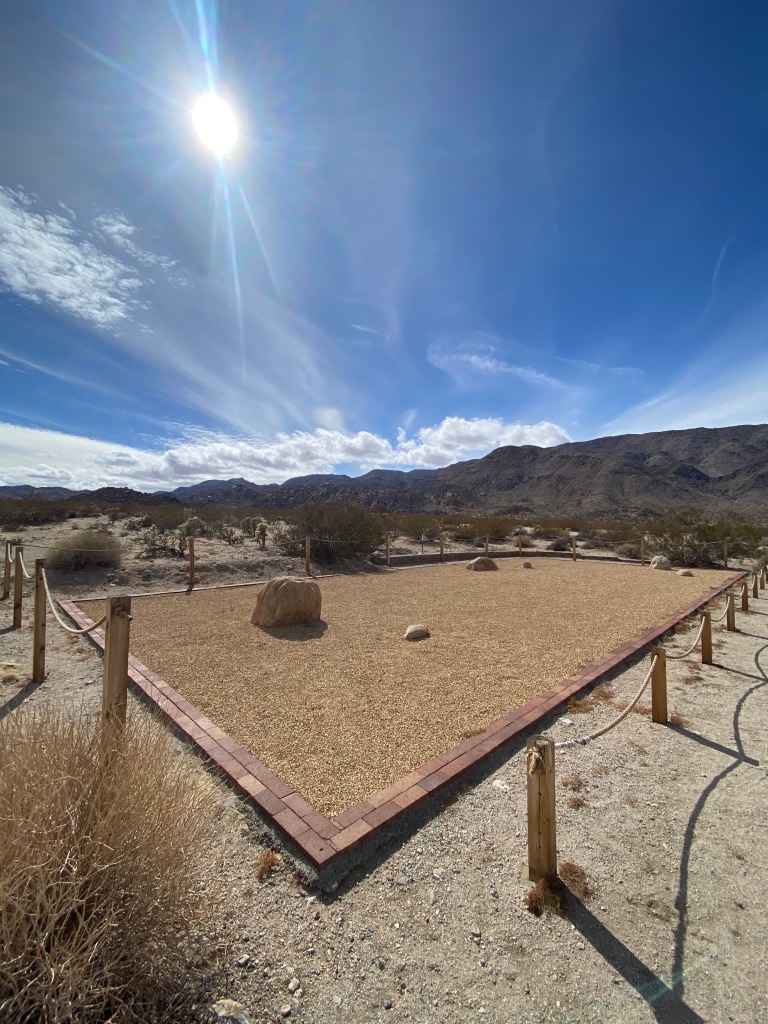
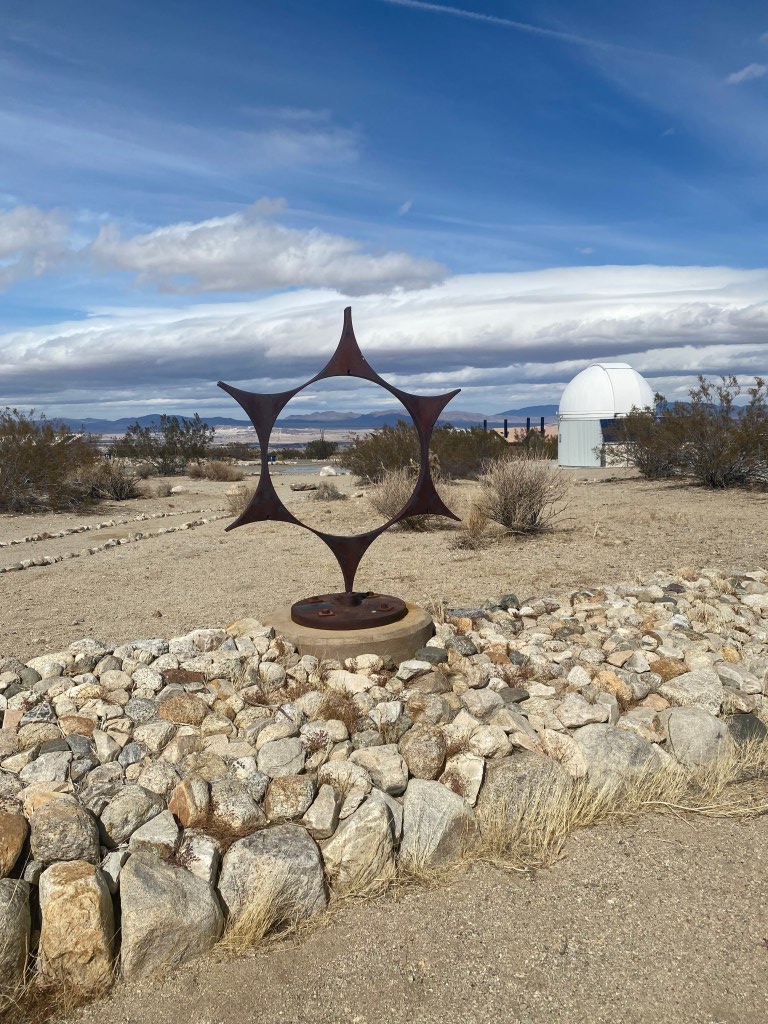
Sky’s the Limit
Sky’s the Limit was a nice little stray out of the way, towards the town of Twenty Nine Palms. Here, they have a meditation garden, sun clock, celestial calendar, stargazing at night, and plenty more to do with a full event calendar. Even when not staffed, we still enjoyed all of the abstract artwork made out of metal modeled after the solar system, planets, & moons.
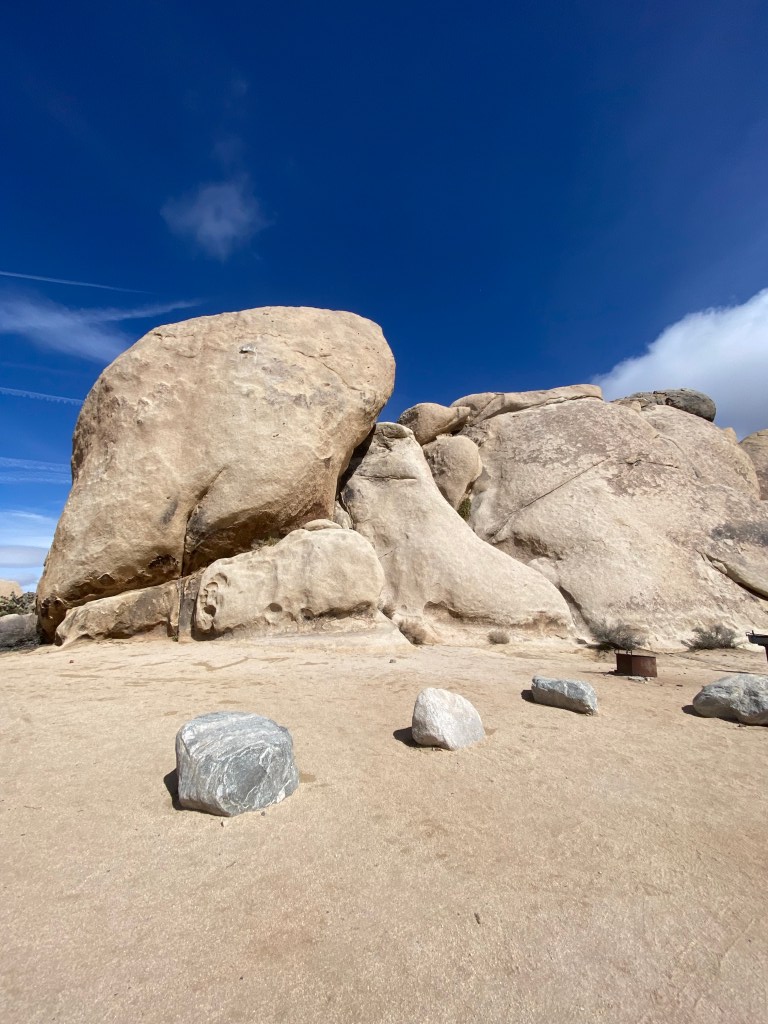
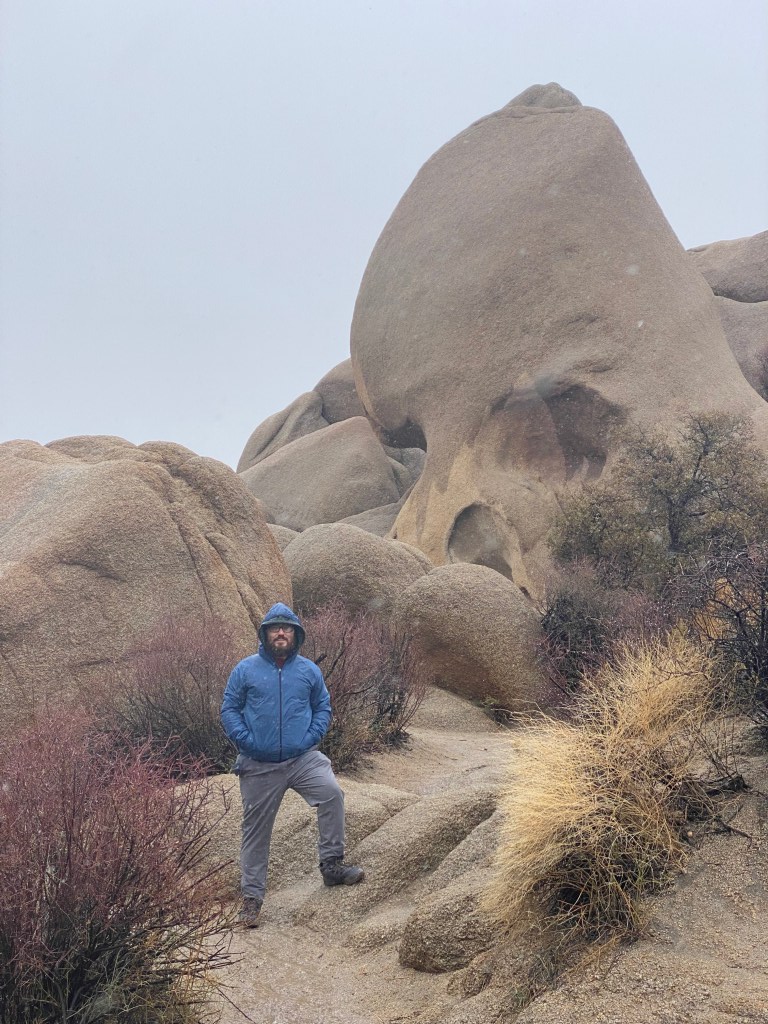
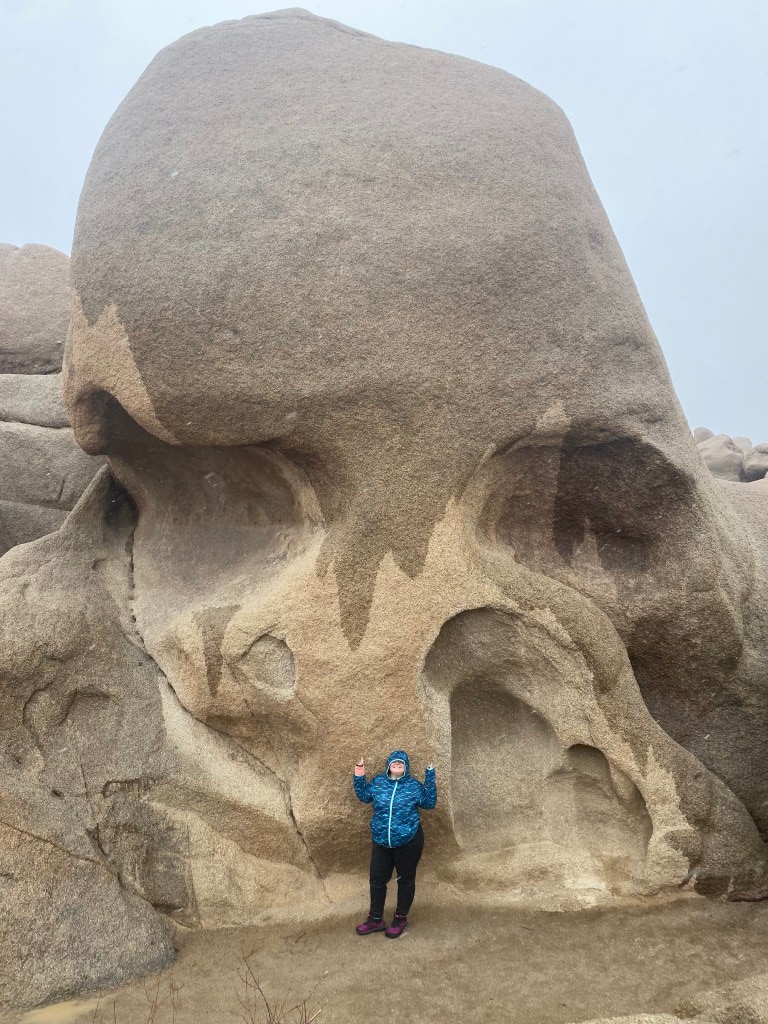
This one looks foreboding and for good reason – it’s literally in the shape of a skull (if you look from the right angle, lol.) It is literally called Skull Rock. As we were walking over to see this incredible rock formation, rain begin to fall. We even began to start to see snow flurries, how much fun!
Parking is on the side of the road right across from this, so very easy to access.
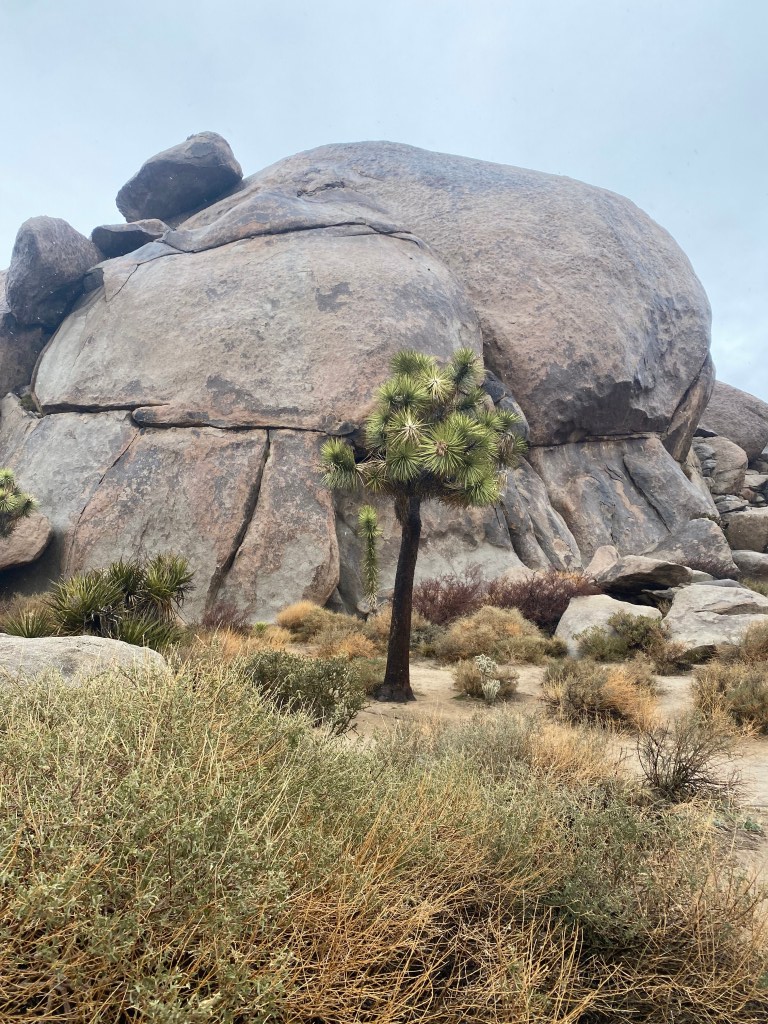
Cap Rock
Advertisements
Cap Rock is another easy walk from the parking lot. It’s pretty cool, because it literally looks like a ball cap on the edge of a rock formation. How long has it been holding onto the edge like that?
Snow started falling as we were sitting in the parking lot here. Our original plan was to head up to Key’s View to have a picnic in our RV there with a great vista all around. But, the rangers shut down the road to Key’s View because of inclement weather, so we pulled off in the nearby Cap Rock parking lot to have lunch with the snow. This detour ended up being a highlight of the day with plenty of fun picture spots.
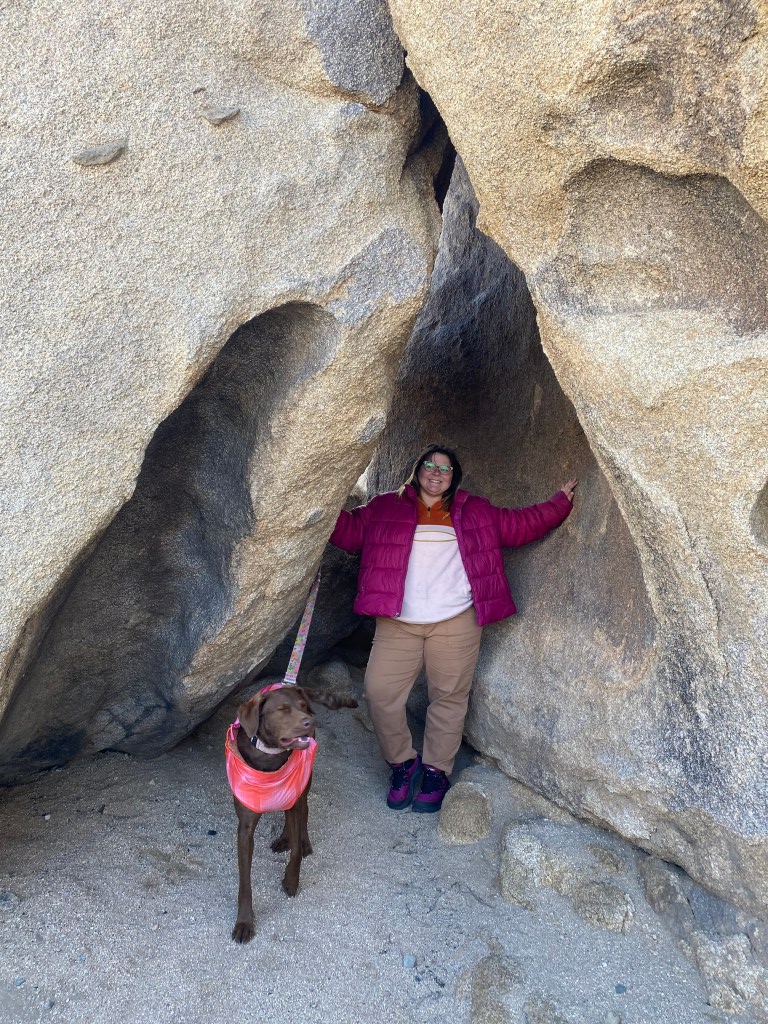
Arch Rock
Narrow passage next to Arch Rock – take this!
Arch Rock looks exactly like that – a natural rock-shaped arch. How incredible is it that nature allows such a beautiful thing to happen?
BONUS: Once you get to Arch Rock, turn to the right. The arch should be on your left now. Keep heading straight through the narrow passages of rocks (top right picture above with a caption). This is an amazing picture-worthy area. If you keep going it turns to the right and there’s even more incredible crevices and rock formations to explore.
Cottonwood Spring
Sorry to disappoint but we didn’t actually get to see a desert oasis spring in the middle of the park. However, there is a spring underground which is indicated by the abnormally large growth of palm trees nearby. This spring feeds a few of the palm trees in this area to keep them growing happy, healthy, tall, and strong.
Advertisements
It’s a great hike to take regardless, and very easy for people of all ages – just a short walk down from the parking area. We ran into a nice elderly couple who had been hiking in the area and had a wonderful chat. Be nice to old people – you never know what you can learn!
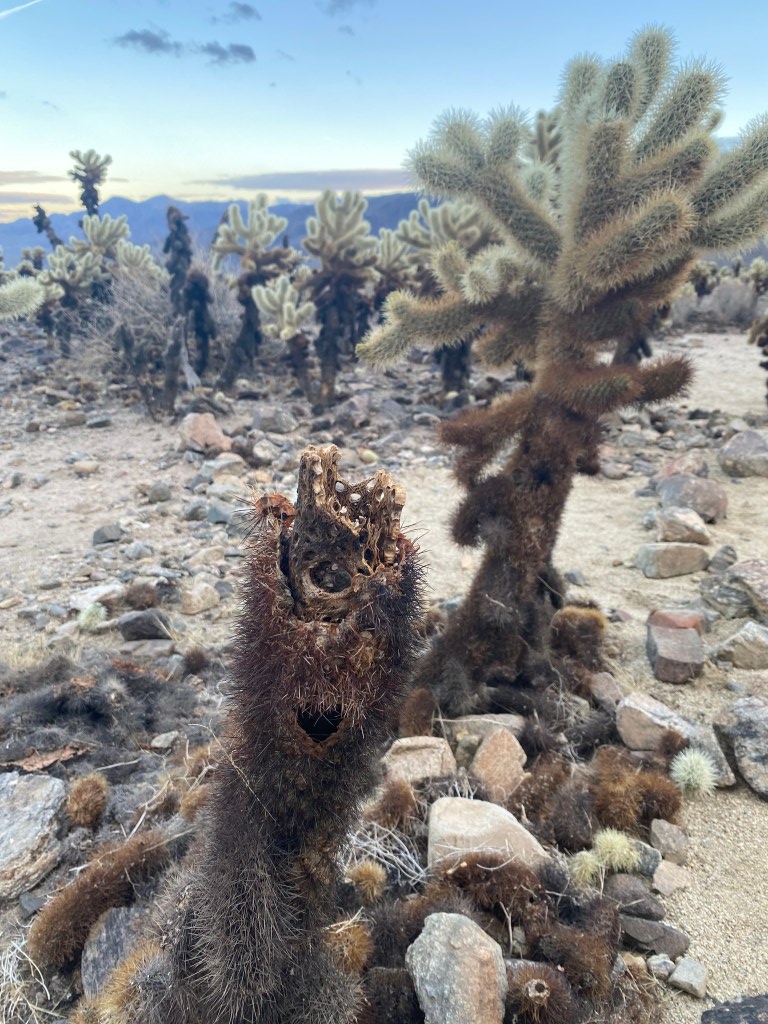
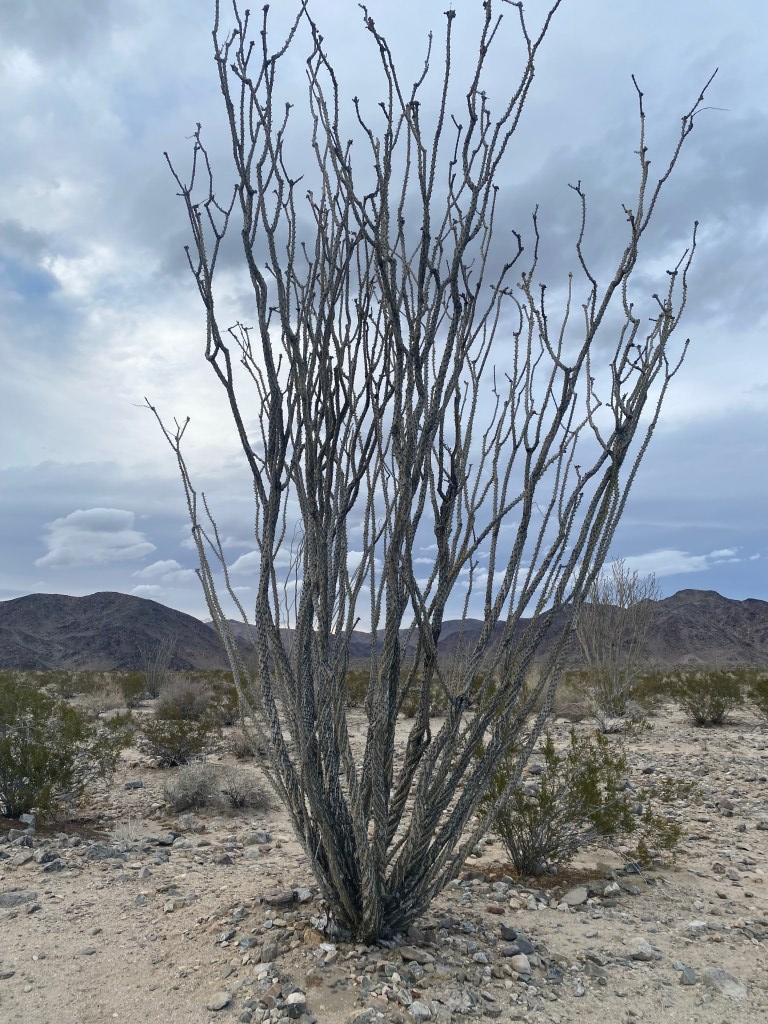
These little cactus guys are something fierce. They can grow taller than people, and when in bloom, have an incredible looking flower. Not to mention that they are super cool and hollow on the inside. Make sure you don’t miss this area when at the park because it is well worth the time. It’s such a beautiful spot with thousands of Cholla cacti situated right off the parking area. The park service has made a walking path that feels like a labyrinth that allows you to get up close. Not too close though! These guys are SHARP.
While we were there, these weren’t in bloom. It’s said that they bloom 2-3 times roughly per year. When they do bloom, they become green, luscious, and even bear flowers. Obviously the pictures we have here tell a different story – not one of thriving and blooms. We saw a few that were starting their regrowth cycle, but I think we must have been too early in the season to see their full potential.
The full bloom of these magnificent cacti-trees. Quite something rare indeed.
This popular destination, perched on the crest of the Little San Bernardino Mountains, provides panoramic views of the Coachella Valley and is well worth the 20-minute drive from Park Boulevard down Keys View Road.
The Keys Ranch is the prime example of early settlement in the Joshua Tree National Park area. Bill Keys was the area’s leading character, and his ranch is a symbol of the resourcefulness of early settlers. The ranch is an extensive complex of small frame buildings built between 1910 and Keys’ death in 1964.
The Hidden Valley Nature Trail Trailhead is located just off Park Boulevard. This trailhead provides access to the Hidden Valley Nature Trail, an easy one mile loop through Hidden Valley on a dirt and rock trail. This is a popular hike through a rock-enclosed valley surrounded by unique rock formations. Along the way there are interpretive signs with information on the area. The trail has an average width of three feet and an average grade of 4% with a max grade of 19% and involves climbing both steps and open rock.
Ryan Mountain is a difficult three mile out and back hike with 1,050 feet of elevation in the central part of Joshua Tree National Park. The first section of the trail is relatively flat, but quickly gains in elevation up the mountain. This is one of the most popular hikes as it provides sweeping panoramic views of the park.
The trailhead for Ryan Mountain is located along Park Boulevard between Ryan Campground and Sheep Pass Campground. There is a secondary trailhead for campers at Sheep Pass Campground, but there is no parking available at Sheep Pass for non-campers.
Explore the rocky desert landscape of Joshua Tree on the Barker Dam Trail, an easy 1.1 (1.8 km) loop. Wander through Joshua Tree’s iconic monzogranite boulders, namesake Joshua trees, and past the historic Barker Dam. Visit a rock art site and experience human history from a respectful distance.
Encounter rock climbers, spot wildlife big and small, scramble over boulders, and walk along desert washes. Catch a glimpse of the far-off San Gorgonio Mountain. View the plant life of the Mojave Desert, including Joshua trees, creosote, Mojave yucca, and pinon pines.
Advertisements
This trail is ideal for short visits, families, wildlife enthusiasts, rock art and history enthusiasts, photographers, and novice scramblers.
Today Lost Horse Mill is considered one of the best preserved mills of its kind in a National Park Service unit. Lost Horse is also a popular destination for visitors looking for a moderate hike. The trailhead is located off Keys View Road. The trail, which is a four-mile round-trip, follows the road developed by the Ryans to haul ore and supplies. Mine shafts are dangerous, and historic structures are easily damaged. While the Lost Horse site has been stabilized, it is still not safe to walk on so proceed with caution.
Lost Palms Oasis is located in the southeastern portion of Joshua Tree National Park. This oasis can be reached on a 7.5 mile out and back hike from Cottonwood Spring with 500 feet of elevation gain. The trail is on a mix of rock, dirt, and sandy washes with very little shade and includes a strenuous climb on rocky terrain out of the canyon that the oasis is located in at the far end of the trail. The oasis is located in Lost Palms Canyon where a permanent water source allows fan palms and other plants to thrive, supporting a vibrant desert wildlife community.
Fortynine Palms Oasis is one of Joshua Tree National Park’s desert oases and is open to the public in the fall, winter, and spring. Located in the northern portion of the park, this oasis provides a refuge among the desert mountains. By providing a reliable source of water, this little oasis allows life to thrive in this seemingly harsh environment.
The oasis is reachable by the Fortynine Palms Oasis Trail, a three mile out and back hike with 300 feet elevation gain in each direction. The trail is on compact dirt with an average grade of 8% and max grade of 27%.
This oasis is a sensitive biological area, please follow posted signs and do not enter the oasis as this is a crucial water supply for plant and wildlife.
In the summer, Fortynine Palms Oasis, its trail, and the parking area all close to allow bighorn sheep undisturbed access to surface water. The park is under drought conditions and herds in the area are increasingly reliant on the oasis spring to survive the hot summer months. The closure will remain in place until summer or fall monsoons provide adequate rainfall to increase water availability.
Which Adventure Will You Take in Joshua Tree National Park?
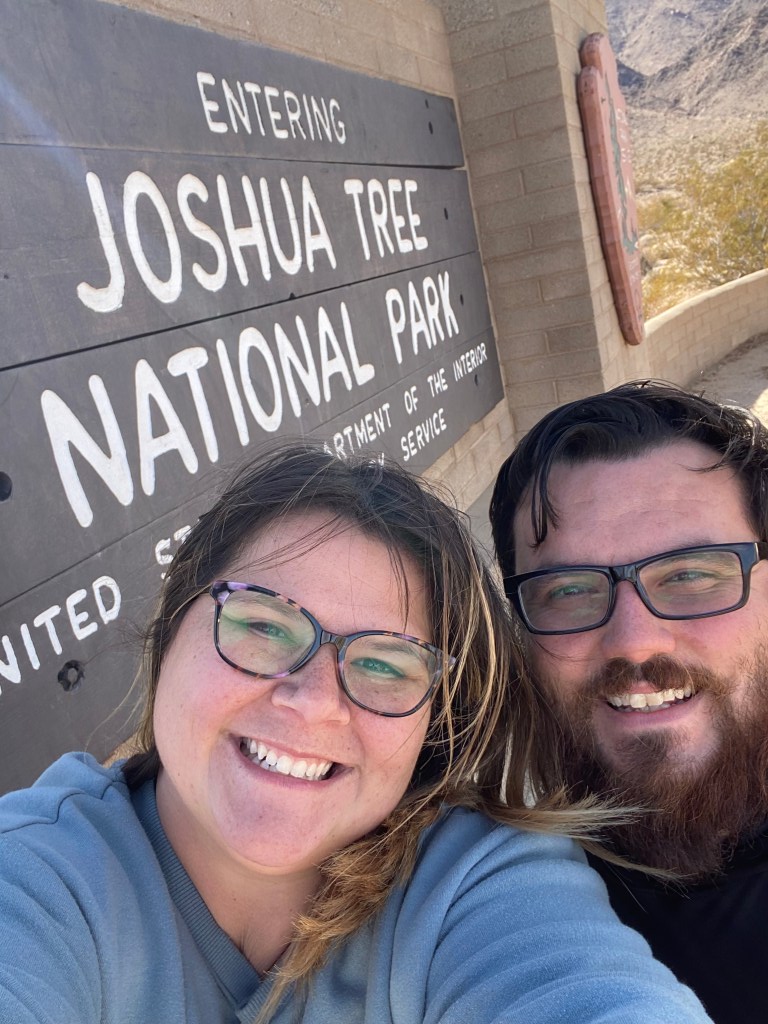
We’ve had a blast writing this blog and hopefully you’ve got some awesome tips for your next trip to Joshua Tree National Park. My girlfriend’s favorite tree is a Joshua Tree – and for good reason. This park is loaded with thousands of them in all directions, and they’re all unique in their own way. Plus, we had the excitement of adventuring the park during a snow day, which is quite an unusual occurrence – like we are!
Advertisements
<img alt="Matt with
Matt with No Place Like Gone
Hey! I’m the man behind the magic – A.K.A. the camera and blog. I’m also a purveyor of craft beer, grill master, and chief RV driver.


![What’s Your [Camping] Type?](https://noplacelikegone.com/wp-content/uploads/2023/12/cac39-rvs-explained.jpeg?w=580)